
Logo and watermark
Set it up once, and every new video carries your logo or watermark.
On this page
Step 1: Open Logo in Assets
In the left sidebar, click Assets, then the Logo tab. Custom logos and watermarks are on paid plans; see Pricing.

Step 2: Upload your logo and place it
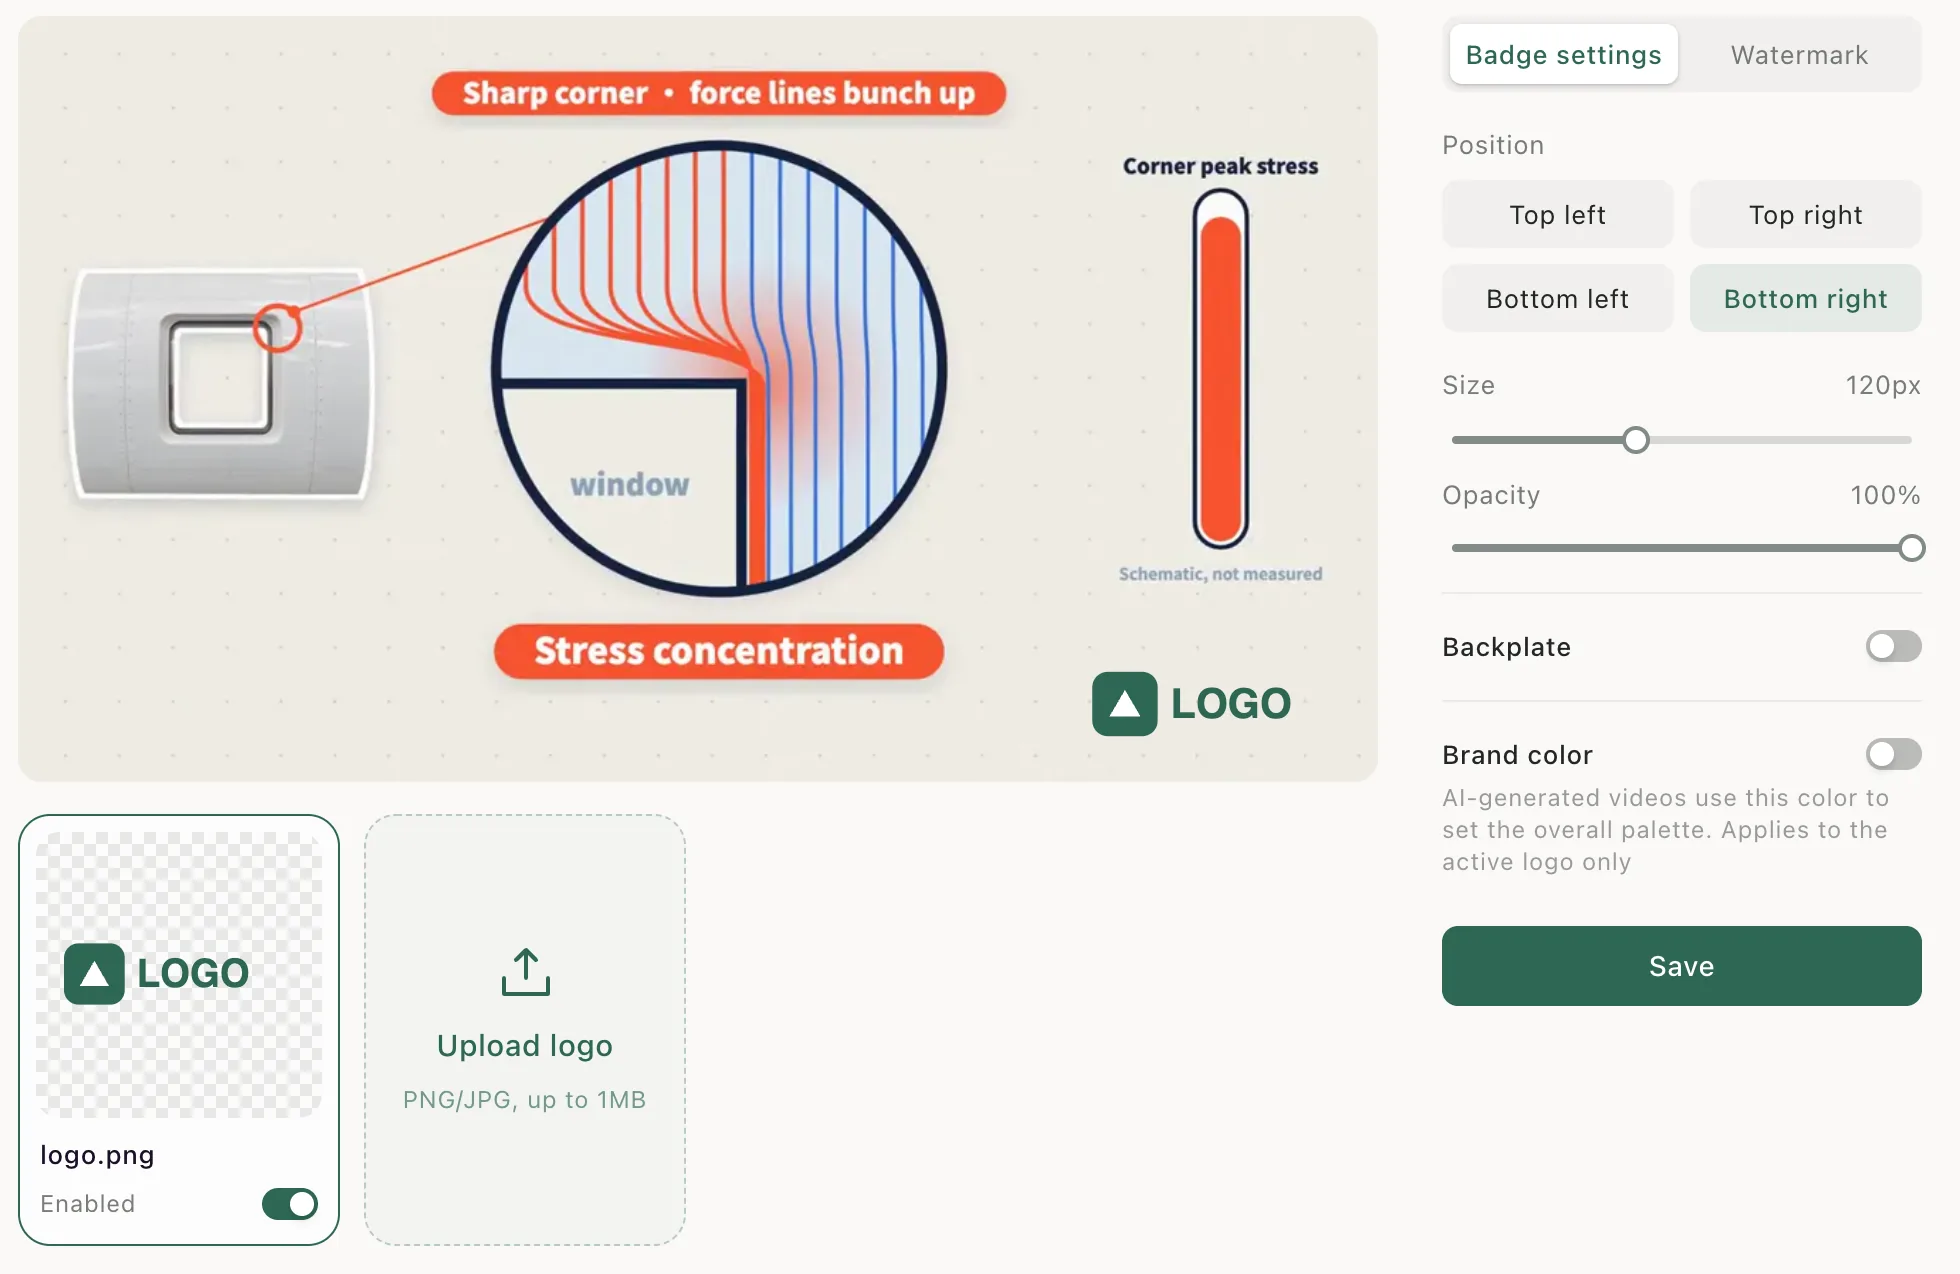
Click Upload logo and choose a PNG or JPG up to 1 MB. A transparent PNG looks cleanest on video. Your first logo turns on automatically. If you add more, use the switch on each card to pick one; only one can be on at a time. Next, choose a Position and adjust Size and Opacity. If the logo gets lost against the picture, turn on Backplate. Then click Save. Brand color is optional: AI-generated videos use it to set their overall palette.
Step 3: Add a watermark
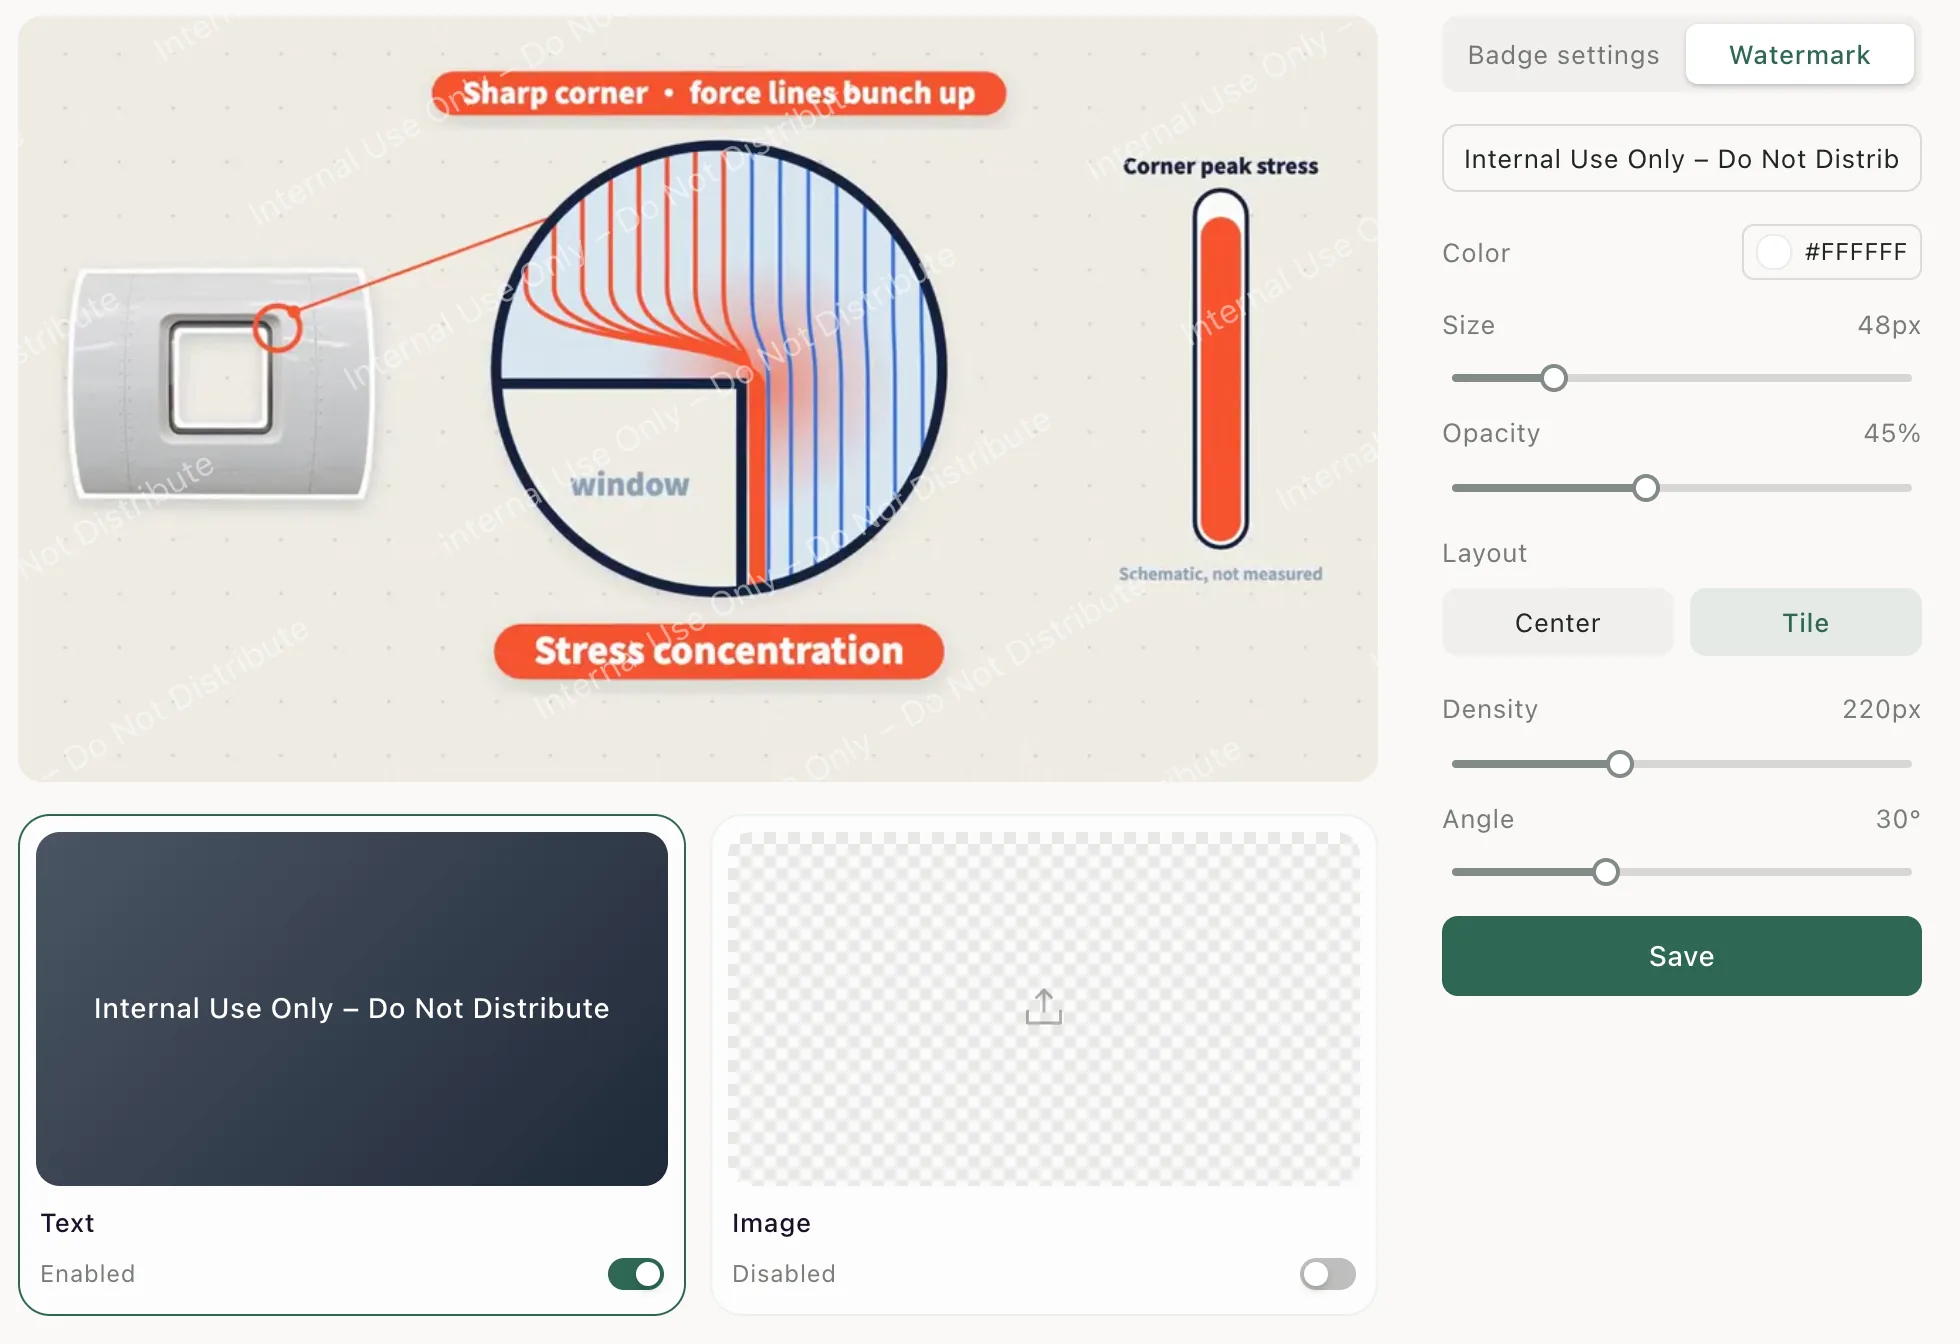
Open the Watermark tab and click the Text or Image card. Type your wording or upload an image, then adjust Size and Opacity (text also has Color). For Layout, Center places one mark in the middle, and Tile repeats it across the frame, with Density and Angle to fine-tune. Click Save, then turn on the switch on the card. Only one of the two can be on at a time.
When to use it
Use a logo when videos carry your brand. Use a watermark for drafts and internal videos, such as “Internal Use Only”.
Good to know
- A logo or watermark only goes on videos you generate after turning it on. Existing videos don't change.
- To stop adding one, turn its switch off.
- Deleting a logo doesn't affect videos that already use it.
- On the free plan, videos show the VibeKnow badge and exports carry a watermark. Paid plans remove the watermark. See Pricing.